Pages

Wednesday, December 31, 2014

Dry aloo curry with tomatoes and onions

I am surprised that I have not posted more recipes with potatoes.  It is by far the most favorite vegetable in our house.   Both my husband and younger son will eat it without complaining.  And I make some form of potatoes at least once a week.

Since it is one of our favorite vegetables, I cook it several different ways so that there is some variety.  I tend to make it as a gravy when I make puris, but on almost all other occasions, I make a dry subzi that can be eaten with both rice and rotis.

My oldest is now back for winter vacation and on the day that he came back, I made these potatoes.  He is cooking for himself now and wanted to know how to make these.  So am posting this recipe so that my baby can make these when he wants to.


Here is what you need:


  • 3 tsp. oil
  • 1 tsp. mustard seeds
  • 1 tsp. jeera (cumin seeds)
  • ½ tsp. saunf (fennel seeds)
  • ¼ tsp. hing (asafetida)
  • few curry leaves (I didn't have any at home, but be sure to add these)
  • 2 green chilies, slit length-wise
  • ½ medium onion, chopped
  • 2 cloves garlic, minced
  • 2 roma tomatoes, chopped
  • 6 medium-sized potatoes, peeled, and cubed
  • ¼ tsp. turmeric powder
  • 3 tsp. red chili powder
  • salt to taste


Here is how I made it:


  1. Heat oil.  Add mustard seeds, jeera, saunf , and hing.
  2. When mustard seeds sputter, add curry leaves and green chilies. Sauté for a minute or so.
  3. Add onions and garlic.  Sauté on medium heat till they turn translucent.
  4. Add the tomatoes and cook till they are mushy and mixed in well with the onions.
  5. Add potatoes, turmeric powder, red chili powder, and salt.
  6. Toss to coat the potatoes uniformly.
  7. Cook covered, on medium heat till the potatoes have absorbed all the flavors – about 10 – 15 minutes.
  8. Remove the cover and cook on med-high heat so that the potatoes get slightly crispy.


Serve hot with rotis or rice.


Lemon Rasam

Living in Colorado, skiing has become a huge part of our winter.  I don’t ski, my husband doesn’t ski, but both my kids love it.  So every December, for the past few years, we have gone to the mountains for 4 – 5 days so that the kids can enjoy skiing without the long morning drive.  We typically rent a house and go with a few other families.

While the kids are out, we watch movies, catch up on reading, sit in the hot tub, and cook.  Most of our dinners are elaborate, and with many helping hands, we can get a gourmet meal to the table very quickly.


For example, on our most recent vacation, we had Chinese soup, noodles, rice, and stir fried veggies the first night, medhu vada, masala dosa, sambar, chutney and tomato rice the second night, vegetable and chicken biryani, chole, bhature, and raita the third night, rotis, potato subji, and left overs the fourth night, and pizza on the last night.  What a feast – right?

And if this wasn’t enough, we had to head straight from the mountains to a wedding reception.  The food of course, was fabulous.


With all this over the top eating, my TamBram husband was ready for some comfort food – rasam and aloo curry.  This time, I made Lemon Rasam. Typically, my mom and mother in law would make this rasam in a eeya sombu.  Since I don’t have an eeya sombu, I make this in a regular stainless steel pot.

Lemon rasam is really easy to make and even people who don’t have a well stocked South Indian kitchen can make it - because you don't need tamarind or rasam powder.  When I make lemon rasam, my husband thinks I have made something special, even though it takes less time and effort to make it.  I do nothing to bust this myth :)


Here is what you need:


  • ½ cup toor dal
  • ¼ tsp. turmeric powder
  • 2 roma tomatoes, chopped
  • 2 – 3 green chilies
  • 1” piece ginger
  • salt to taste
  • few curry leaves
  • ¼ tsp. hing (asafetida)
  • 1 tsp. ghee
  • ½ tsp. mustard seeds
  • ½ tsp. jeera (cumin seeds)
  • juice of one lemon or lime


Here is how I made it:

  1. Rinse the toor dal and cook in a pressure cooker with enough water until done. Set aside
  2. With a mortar and pestle, slightly crush the ginger and green chilies (pound it a couple of times).
  3. Take about a cup of water in a pot.  Add the ginger, green chilies, tomatoes, and turmeric powder
  4. Bring this to a boil and reduce the heat.
  5. Take the cooked toor dal and mash it up so that the dal is mushy.  Add enough water (maybe another cup or cup and a half) and pour this into the rasam.  Add salt, hing and curry leaves.
  6. Cook the rasam on low heat till bubbles form on top.  It should look frothy (you can see it in some of the pictures). Take care, not to let this come to a boil.
  7. Add cilantro and turn off the heat.
  8. In a separate pan (I have a small ladle with handle), heat the ghee.  Add mustard seeds and cumin.  When the mustard seeds sputter, pour this on top of the rasam.
  9. Add lemon/lime juice and mix well.  If your lemon or lime is not juicy, you many need to add more.


Serve with rice and potato curry.  Some people prefer to drink this as is - like a soup.


Friday, December 12, 2014

Minestrone Soup

Back in 1994, when I moved to Boulder, there were very few Indians in the area.  Our social circle included a few, wonderful, grad students, and a few couples.   We had two Anands and two Rameshes in our group.  Both Anands were from IIT Madras, same year, same branch.  One Ramesh was a confirmed bachelor and the other was married.  We also had a couple of other friends with little kids (now those kids are 24 – 25 years old!).

Every weekend, we would either meet in one of our houses or go out to eat.  We had our usual set of restaurants to visit – Bangkok Cuisine for Thai food, Jose Muldoon’s and Pablos for Mexican, Gandhi’s for Indian, Ras Kassa’s for Ethiopian, and this place called Grisanti’s for Italian.  Our group was loud, full of laughter, and a lot of fun.  I pity the people who were seated in the tables around us.


We especially liked to go to Grisanti’s if someone was having a birthday, because the waiters sang for you in a really special way.  I think this was the first place I heard the words “soup thadiyan”.  While this definitely loses its meaning in translation, it could be interpreted as a man who has become fat on soup.  The married Ramesh would keep calling one of the Anands “soup thadiyan” every time he ordered soup. 

I love soups and keep thinking of this phrase when I make them.  I used to make soups a lot, but after my oldest went off to college, I am making them less.  My husband and youngest will have soup, but it is not something they love or look forward to.  So only I end up having soup day after day – to finish up the leftovers.


So, when we were coming up with a menu for Thanksgiving, and it was leaning toward Italian, I decided to make minestrone soup.  This is lighter than chili and but rich enough to serve for Thanksgiving.

Here is what you need:

(serves 8)

  • 3 – 4 tsp. extra virgin olive oil
  • ½ yellow onion, chopped
  • 1 – 2 tsp. minced garlic
  • 1 stalk celery, minced
  • 1 carrot, peeled and diced
  • 6 – 8 green beans, trimmed and diced into ½” pieces
  • 1 tsp. dried Italian spice blend
  • salt to taste
  • 6 large tomatoes, chopped fine (you can use canned, diced tomatoes)
  • 4 cups organic vegetable broth
  • enough water to get the right consistency
  • 1 can red kidney beans, drained and rinsed
  • 1 can navy beans, drained and rinsed
  • ½ cup shell pasta
  • finely chopped fresh basil
  • grated parmesan cheese
  • freshly ground pepper


Here is how I made it:


  1. Heat oil in a big pot.  Add onions and fry till translucent.
  2. Add the garlic and fry for a few seconds.  Add celery and stir well.
  3. Add carrots, beans, spices, and salt.  Mix well and cook on high heat for about five minutes.
  4. Add the tomatoes.  I had so many tomatoes from my garden at the end of summer.  I had chopped and frozen these for later use.  Home grown tomatoes have a great flavor, but if I don’t have these, I use canned tomatoes.
  5. When the tomatoes are mixed well, add the vegetable stock and enough water to get the right consistency.
  6. Bring this to a boil and reduce heat to a slow simmer.  At this point I transferred the soup to a crock-pot and let it slow cook for a couple of hours, but you can keep it on the stove for about 15 – 20 minutes.
  7. Add the beans and the pasta.  Let this cook for 10 more minutes till the veggies are done and the pasta is cooked.  If you are using a crock-pot, let it cook on low for about ½ hour and then switch it to the “keep warm” setting.
  8. Add basil a few minutes before serving.


To serve:

Ladle generous amounts of soup into bowls. Top with parmesan cheese and freshly ground pepper.  Serve with crusty French bread or croutons.


Friday, November 28, 2014

Avocado Spring Rolls

We hosted Thanksgiving dinner at our place this year.   A few of our very close friends came over for dinner.  Three of the college going kids came back home for the holidays.  It was great to have the house full of people and the kitchen full of food! 

Normally, a very good friend of ours hosts Thanksgiving dinner at their place.  This time, I really wanted to have it at our house.  I don’t remember the last time we had people over for Thanksgiving.  Most of my course work was done and my Saturday classes were also done.  So it felt like a good way to celebrate.


We had an Italian themed potluck dinner. The menu:  Appetizers: bruschetta, spinach dip, cheese and crackers, chips, salsa, guacamole, and avocado spring rolls; Main Course: Minestrone soup, greens salad, quinoa salad, pasta salad, mashed potatoes, eggplant parmesan, mushroom strudel, broccoli strudel, baked mac and cheese,  grilled veggies, and cranberry sauce; Dessert: Pumpkin pecan pie, mango panna cotta, and pumpkin bread

My husband made the grilled veggies, my oldest made the baked mac and cheese, my youngest made the mango panna cotta, and I made the guacamole, avocado spring rolls, soup, and quinoa salad.


As usual, we had way too much food and people ended up taking a ton of food back with them.

I have had avocado eggrolls in Cheesecake Factory.  I almost always end up ordering these when we go there.  I wanted to make something different for appetizers for this party and decided to make these. 

I had dumpling wrappers that I had bought for something else.  These are super easy to use and don’t take much time to make.  They are circular and are made with flour and water.  I made sure that the ones I used had no eggs because a couple of the people who were coming over don’t eat eggs.  I also have a mold that I use to press the dumpling into shape.  I filled them up with the avocado mixture and deep-fried them.  They turned out great – almost as good as the ones you get in Cheesecake Factory!


Here is what you need:

(makes about 30 – 40)

For the filling:

  • 6 medium sized avocados
  • 1 jalapeno, diced
  •  ½ red onion, chopped
  • ½ cup chopped cilantro
  • ½ cup sundried tomatoes, packed in oil
  • salt to taste


For the spring rolls:

  • dumpling wrappers
  • water
  • oil for deep-frying


Here is how I made it:


  1. Dice the avocados into small chunks. I used slightly ripe avocados, so that they don’t turn mushy.
  2. Add the chopped onion, diced jalapenos and cilantro.
  3. Pour the oil from the sundried tomatoes into this.
  4. Dice the sundried tomatoes, add it to the avocados, add salt and mix it in.
  5. Heat oil for deep-frying.
  6. Take dumpling wrappers on at time and place on the mold. Wet the whole wrapper with water.
  7. Place a spoonful of filling in the center and close the mold, pressing it hard, so that the edges are sealed.  (If you don’t have a mold, you can place the wrapper in the palm of your hand and hand press to seal the edges.)
  8. When you have five or six ready, drop them in the hot oil and fry over medium heat till all the filling is done.

Serve hot with spicy sauce of your choice.


Tuesday, November 11, 2014

Masala Vadai

Masala vadai is by far my most favorite vadai of all times.  It is really difficult to mess up and the textures and flavors in each bite are so amazing. 

My mom would make a close cousin of masala vadai for festivals, called aama vadai.  Aama vadai is made without onions or garlic, and is made for several festivals.  I don’t remember her making masala vadai at home.


Masala vadai is most often sold as a street food – on the beach, and my most favorite source – the vadai man near Adyar Bakery.  We used to live in the Adyar area, a really long time ago.  This was early to mid 1980s.  Those days, it was unheard of to eat out regularly or get any food from outside (at least in my house).   We probably ate out once or twice a year!

The vadai man had just started his business around this time and had set up shop in a small alley next to a famous bakery.  You could not pass by his stall without drooling at all the wonderful aromas of keerai vadai and masala vadai!  So, occasionally, when we went out for shopping, we would get off at the big bus terminus in Adyar and stop by this stall to get an assortment of goodies – masala vadai, keerai vadai and milagai bajjis.  What a treat this was!  I think this person is still in business and is still doing extremely well.  


Anyway, my mom was here for three months and left just before Deepavali.  While she was here, we hosted several dinner parties and attended numerous others.   The food at each party was so amazing and different, that I am still recovering from the culinary feast we have been experiencing!

She noticed, however, that no one made masala vadai.  I never thought about it till she mentioned this to me, because there was a point in time, when I would make it often.  I also went back and looked at my blog posts and realized that I had not posted the recipe for this.

We had a Deepavali party last weekend, and so I decided to make this for the potluck.  


Here is what you need:

(makes about 60 vadais)

  • ¾ cup channa dal
  • ¾ cup split green peas
  • ½ cup toor dal
  • ½ cup moong dal
  • ¼ cup urad dal
  • 4 – 6 red chilies
  • 4 – 6 green chilies
  • 1” piece ginger
  • 1 – 2 cloves garlic (optional)
  • ½ tsp. asafetida (hing)
  • salt to taste
  • ½ tsp. saunf (fennel seeds)
  • 1 medium red onion, chopped
  • ½ cup chopped cilantro
  • 1 cup chopped spinach leaves (optional)
  • ¼ cup mint leaves, chopped (optional)
  • few curry leaves, chopped
  •  

Here is how I made it:

  • Soak all the lentils together for a couple of hours.


  • Drain the water out and grind these along with green chilies, red chilies, ginger, garlic, hing, and salt, to a coarse paste, adding little or no water.  I use my food processor to make this batter and don't add any water.


  • Add the saunf, chopped onions, spinach, cilantro, mint, and curry leaves.  Mix well.  I added spinach, but no mint, because I did not have any at home. 
  • Heat oil for deep-frying in a deep pan or kadai.


  • Make lime size balls of the batter, flatten it slightly and gently drop it into the oil.  You can fry 5 - 6 vadas simultaneously.
  • Fry the vadas on medium-low heat, turning them over occasionally, till they are golden brown on both sides.
  • Repeat till all the batter is done.


     Serve hot with chai and chutney of your choice.


Saturday, November 8, 2014

Vegetable Khichdi

I don’t remember ever having khichdi growing up.  We had pongal – of course – which is as close to the North Indian khichdi as we can get.

So when I got married and came here, and my husband (who grew up in Kolkatta) asked me to make khichdi for him, I had no idea how to make it.    I looked up the recipe in a Bengali cookbook (this was way before the internet) and made it.  I loved the spices used to flavor this dish.  The recipe was so simple, yet flavorful, and aromatic!  I fell in love with this healthy and delicious dish and make it often – especially when we need a break from some heavy, rich food like we’ve been eating.


Every time I make khichdi,, my husband loves to say "Khichdi ke chaar yaar - dahi, papad, ghee, aachar" (khichdi has four friends - yogurt, papad, ghee, and Indian style pickles).

I used to think - what a cool way to remember the things to serve with khichdi!

Now - I just give him the "look".

Anyway, I make khichdi several ways – with just dal and rice, with veggies, and sometimes the Bengali version.  I made this in my rice cooker – so it did not get mushed up too much.  I like it this way, because it tastes great even after a couple of days, whereas the mushed up version becomes lumpy and unappetizing if it is left over.


Here is what you need:

(easily serves 4 people)

  • 2 tsp. ghee
  • 1 tsp. cumin seeds
  • 1 bay leaf
  • few curry leaves
  • 1” piece slivered ginger
  • 2 green chilies, slit length-wise
  • ¼ tsp. turmeric powder
  • 1 tsp. freshly ground pepper
  • 1 cup veggies of your choice – I used carrots, beans, and potatoes
  • 1 cup basmati rice
  • 1 cup split moong dal with skin
  • ½ cup split moong dal without skin
  • salt to taste


Here is how I made it:


  1. Heat ghee in a pan.   Add cumin seeds and bay leaf.
  2. When the cumin seeds change color, add the ginger, curry leaves, and green chilies.  Saute for about 30 seconds.
  3. Add the turmeric and freshly ground pepper.  Mix well.
  4. Add the chopped veggies.  Sauté on medium heat for a few minutes.
  5. Meanwhile, wash the rice and dal in several changes of water. 
  6. Add this to the veggies in the pot.  Mix well and fry for a couple of more minutes.
  7. Add salt to taste.
  8. Transfer this to a rice cooker.  Add about 6 cups of water (you can cook this directly on the stove-top, but I used a rice cooker).  Let this cook until done.
  9. Serve hot with dahi (yogurt), papad, ghee, and aachar (Indian style pickle)

Wednesday, October 8, 2014

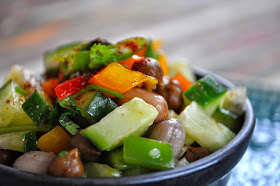
Delicious Salad with Kala Channa and Peanuts

I know I said that I would post a sundal recipe everyday for the entire nine days of Navarathri.  In my defense, I started off with good intentions, but life took over.  With a big party on the weekend, and with huge assignments due for my course, and with grading – all piling up, I just couldn’t do justice to the sundal posts!


Anyway, my party went off well.  We had over 70 people come on Sunday for my Navarathri golu.  I also had some of my colleagues come on vijayadasami.  The food and company were good on both occasions.  Having my mom here really helped with food preparation for that many people!  

Now that the festival is done, I have a lot of varieties of sundal left over.  Typically we make one kind everyday and it just goes into the fridge, because there is a new one you make the next day.  So I decided that I was going to use these up by adding them to other recipes.


This salad is made with kala channa and peanuts.  Since I make a lot of my sundals without coconut, I can just use it as is in these recipes.  My friend, Usha, told me that she rinses out the masalas from her sundals before using them in other  recipes.

This salad is really fresh and delicious.  It has some protein because of the lentils and peanuts.  It is a great way to get fresh veggies into your system!


Here is what you need:


  • 1 cup kala channa (small, dark brown garbanzo beans), soaked over night
  • 1 cup shelled peanuts
  • 1 English cucumber, diced
  • ½ red onion, chopped
  • 2 cups assorted peppers (I used red, yellow, and orange), seeded and diced
  • salt to taste
  • cilantro for garnish
  • 2 – 3 green chilies
  • juice of 1 large lime
  • chili powder to taste


Here is how I made it:


  1. Boil the kala channa and peanuts with salt in a pressure cooker till done.  Drain and set aside
  2. In a bowl, mix together the cucumbers, onions,  peppers, kala channa, and peanuts.
  3. Add salt, green chilies, and cilantro.
  4. Squeeze lemon or lime. Mix well
  5. Sprinkle chili powder on top


Friday, September 26, 2014

Black-eyed Peas Sundal

I miss being in Chennai during the festival season.  Even if you don’t celebrate everything, the charge in the atmosphere gets you in the mood.  I think I have mentioned in previous posts that my mom did not keep golu, but I loved looking at all the dolls in Kadhi Bhandar, Poompuhar, and in the street side shops on Mada Street.  It felt like the whole city was one big doll exhibition!  

The clothes and jewelry stores doing brisk business, especially with Deepavali just around the corner, the flower vendors selling their wares to all the mamis getting dressed up for vetthilai paaku, the small street-side stores that sell mini mirrors, combs, and bangles that are part of the goody bag treats – I really miss all that excitement!


Here Navarathri is so low key.  If I did not keep Golu, it would be just a mundane routine for 10 days.  I am glad that my mother-in-law started this tradition for me, because now my kids have some memories to associate with Navarathri – maybe not as colorful as mine, but still better than not doing anything special.

For today’s sundal, I soaked black-eyed peas this morning before going to school.  It really doesn’t need that much soaking, but since I wanted to make it as soon as I got back, I soaked it in the morning.  Like all other sundals, this one is also very simple to make and cooks very easily.  


Here is what you need:


  • ½ - ¾ cup dried black-eyed peas
  • salt to taste
  • ¼ tsp. hing (asafetida)
  • ¼ tsp. turmeric
  • 2 tsp. oil
  • ½ tsp. mustard seeds
  • ½ tsp. jeera (cumin seeds)
  • 2 red chilies
  • a bit more hing
  • 3 – 4 curry leaves
  • 2 – Tbsp. coconut, grated

Here is how I made it:


  1. Soak the black-eyed peas for 3 – 4 hours
  2. Pressure cook the peas with salt and hing.  ( I cook it for about 5 minutes on low after the first whistle)
  3. Remove the peas and drain the water.
  4. Heat oil in a saucepan.  Add mustard seeds, cumin, hing, and red chilies.  When the mustard seeds sputter, add the curry leaves.
  5. Add the cooked peas and mix well.
  6. Fry this for a couple of more minutes. Turn off the heat.  Add the coconut and mix well.


Thursday, September 25, 2014

Pattani Sundal (Green Peas Sundal)


For the first day of Navarathri, I made pattani (green peas) sundal.   I love sundals.  They are so simple and easy to make and taste great.  For Navarathri, we make a different sundal everyday, for nine days.  Coming up with nine different sundals is always a challenge.  After the first few days, you need to get creative with your choice of grains.  I am thinking of posting my sundal recipe for each day.  Let’s see if I am successful.


Green Peas Sundal


Today, my husband has a dinner with colleagues.  It is just my mom, my son, and me for dinner.  My mom said that she will just have dosas with some left over batter and that she doesn’t want anything else.  So I got a pizza for my son.  So the only cooking that happened today at home was the sundal :)

Here is what you need:

  •  ½ - ¾ cup dried green peas
  • salt to taste
  • ¼ tsp. hing (asafetida)
  • 2 tsp. oil
  • ½ tsp. mustard seeds
  • ½ tsp. jeera (cumin seeds)
  • 2 red chilies
  • a bit more hing
  • 3 – 4 curry leaves
  • 1 – 2 tsp. masala powder
  • 2 tbsp. coriander seeds 
  • 2 tbsp. channa dal
  • 3 red chilies
  • 1 tsp white sesame seeds


Here is how I made it:


  1. Dry roast all the ingredients for the masala powder.  Let it cool, powder it coarsely and store in an airtight container.
  2. Soak the green peas overnight (I soaked it in the morning and made it in the evening).
  3. Pressure cook the peas with salt and hing.  ( I cook it for about 6 – 7 minutes on low after the first whistle)
  4. Remove the peas and drain the water.
  5. Heat oil in a saucepan.  Add mustard seeds, cumin, hing, and red chilies.  When the mustard seeds sputter, add the curry leaves.
  6. Add the green peas and mix well. Add the masala powder and toss to coat.
  7. Fry this for a couple of more minutes.


Yummy, simple, healthy, sundal is ready!

Note:  You can add coconut or ginger also to this.  I did not.


Wednesday, September 24, 2014

Dahi Balle

Navarathri is just around the corner.  I normally call people over in two or three groups - so that we can actually have decent conversations with each other.  But, we only have one weekend to celebrate the festival this year.  So I have invited all my friends for an open house dinner on Sunday.  It is going to be a super busy weekend because I have a full day classes on Saturday, an hour or so away from home.  I don’t like to do potluck for Navrathri and cook all the food at home.  Most years, I spend the few days leading up to my party cooking.  This time though, my mom is here and I am not feeling too stressed about the cooking.


I tend to agonize about the menu for days before coming up with something I am happy with.  Even after that I keep obsessing about the food and other arrangements, worried that I won’t have enough,  or that I am forgetting some important detail that is going to mess up everything.  I make extensive lists, who's coming, age group, what I am going to give them with vetthilai paaku, what I have to make when, grocery lists etc.

Anyway, I have finalized the menu and am hoping that things turn out the way I want them to.  One of the things I am making is dahi balla.  This is a great dish to  make ahead of time because it freezes well.  It is also easier to make than regular medhu vadas because you don’t have to shape them into vadas, but can drop spoonfuls of dough into the oil – so it gets done much faster.


Here is what you need:

(To make about 20 – 25)


  • 1 cup whole urad dal (dehusked)
  • 3 – 4 green chilies
  • salt to taste
  • oil for deep frying
  • 1½ - 2 cups yogurt
  • salt to taste
  • ½ tsp. chili  powder
  • sprinkling of chaat masala
  • 1 tsp. fresh roasted and powdered cumin powder
  • tamarind chutney
  • cilantro chutney
  • cilantro
  • sev


Here is how I made it:


Soak the urad dal for a couple of hours.  Grind it along with the green chilies to a smooth paste adding very little water.
Add salt to the batter and mix well.
Heat oil in a deep pan.  Drop spoonfuls of dough (so that they look like doughnut holes) into the hot oil.  


Fry on medium heat till the vadas turn golden brown.


Remove from oil and immediately put these in hot water.  Let these sit in the hot water for about a minute.


Squeeze out the water completely and place these on a serving dish. Repeat till all the batter is done.
Meanwhile, beat the yogurt till it is creamy.  Add salt, chili powder, and chaat masala power. Mix well.
Pour this over the vadas.  Top with little more chili powder and the roasted cumin powder.
Just before serving, garnish with the chutneys, cilantro and sev.


Thursday, September 11, 2014

Bisibele Bath with Leftover Sambar

We have been extremely busy the past few weeks.  My brother and my sister-in-law visited us for the first time!  School has stated in full swing.  Soccer is going on.  My classes for getting my Teaching License are also going on.  On top of that, I have additional meetings and seminars to attend because I am a first-year teacher.


Sometimes, it feels like I am just letting a lot of things slip through my fingers, because I am not keeping track of them!  We forgot our son’s back-to-school night last night,  and I am not responding to e-mails and stuff because I don’t respond right away and then forget that I am supposed to.  With Navarathri also around the corner, I have to find a way of being better organized! 

Anyway, coming to today’s recipe – I make this occasionally when I have a lot of left over sambar. Sometimes I make sambar to go with idli and dosa and then have around half of it left.  Or, I may make it for a party and realize that I have made too much.  This is a great way to elevate the status of you regular, everyday sambar to an awesome Bisibele Bath.


You can make fresh rice or use left over rice.  If you make rice like I do, I like my grains to be separate and not mushy.  For bisibele bath though, it is nice to have mushy rice.  So if I am using left over rice, I add a little water to it and microwave it for five minutes to make it mushy.

Here is what you need:

(To feed 3 – 4 people)

  • 2 tsp. ghee (or oil)
  • 2 – 3 red chilies
  • 1 Tbsp. cashews
  • few curry leaves
  • ¼ tsp. hing (asafetida)
  • 2 green chilies
  • 10 – 12 pearl onions, their tops and roots cut off and peeled
  • ½ green pepper, diced
  • ½ cup veggies of your choice - you can add some carrots, potatoes, beans or peas (depending on what vegetable you have already used in your sambar)
  • 2 – 3 cups leftover sambar
  • 1 ½ cups rice, cooked (you can make it a little mushy)
  • salt to taste
For the Masala Powder:
  • 3 red chilies
  • 1 Tbsp. channa dal
  •    Tbsp. coriander seeds
  • 1 small piece of flat cinnamon
  • ¼  cup grated coconut
  • 2 Tbsp. cup fried gram dal


Here is how I made it:


  1. Dry roast all the masala powder ingredients (except coconut) till the dal turns golden brown.  Add the coconut to the pan and sauté for a few minutes till the moisture is absorbed and it looks dry.
  2. Grind this to make a coarse powder.  Set aside.
  3. Heat ghee/oil in a pot.  Add red chilies, cashews, curry leaves and hing.  Mix well.
  4. When the cashews start turning golden, add the green chilies and pearl onions (if your sambar already has pearl onions, you can skip this)
  5. Sauté for a couple of minutes and add the peppers and any other veggies that you are using.  Let this cook till the veggies are almost done.
  6. Now add the leftover sambar and bring it to a boil.
  7. Add the masala powder.  Mix well.
  8. Gently fold in the cooked rice.  Check for salt.
  9. Cover and let this simmer for 5 – 10 minutes on low heat.


Serve hot with papadums and raita